Receiver tab
One of the first things you should do is to connect a receiver to the FC. Your FC has several UARTs, and each UART has a TX and an RX. A receiver needs to be connected to an RX and/or TX pad, depending on the type of receiver.
Receiver Configuration
First activate Serial Rx on the UART you have connected your receiver.
Receiver Type
There are many receiver protocols supported in Rotorflight, SBUS in the one of the most known receiver protocols, however it is not telemetry capable. On the Other hand FrSky F.Port and ELRS are the most used protocols because they support telemetry and thus allow you to use the Rotorflight LUA app to perform tuning using you radio.
- SBUS needs to be connected to an RX pad.
- SBUS with S.Port: the SBUS pin needs to be connected to a free UART RX, and the S.Port pin needs to be connected to a free UART TX (of another free UART), and you activate
Telemetry: FrSky SmartPorton that UART.
- F.Port needs be connected to a TX pad, with
Inverted Serial Signalingactivated ,andHalf-Duplexactivated.
The Inverted Serial Signaling option will work only on F7/H7 or G4 type mcu, if you are using an F4 mcu, then you need to use and external signal inverter, or hack your receiver to get an Un-Inverted signal for SBUS, S.Port, and F.Port.
for more info check Uninverted SBUS and Smart Port on Frsky Receivers
- CRSF/ELRS needs an RX and a TX on the same UART.
Please see the documentation for your FC for more details on how to connect your receiver.
Receiver Channels
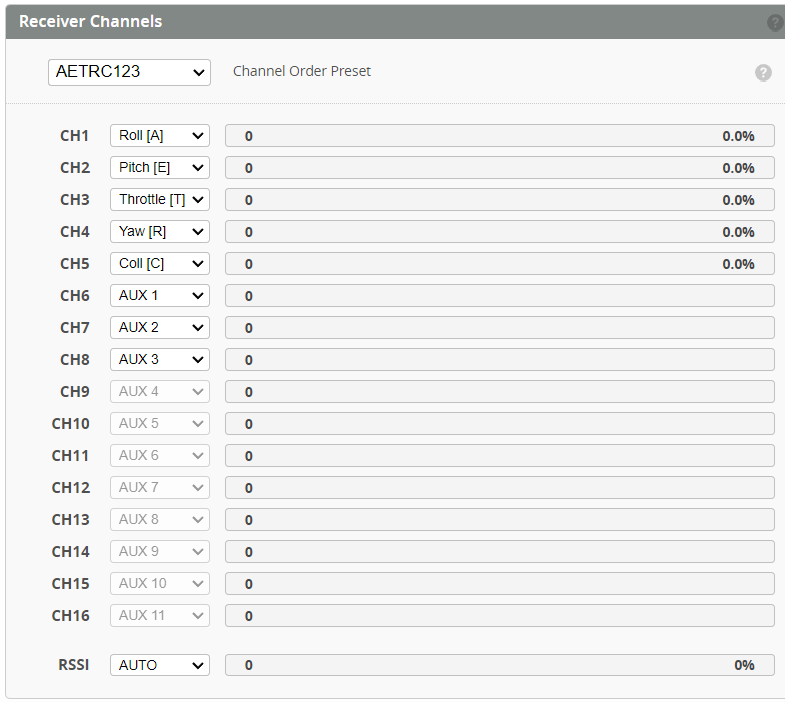
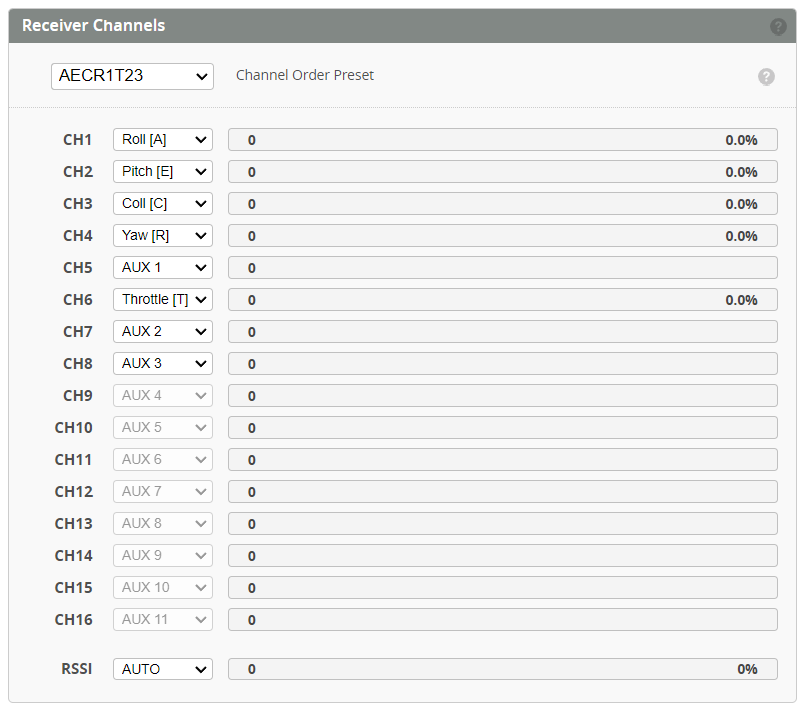
Select the corresponding channels order based on the selected receiver type.

- For FrSky receivers, set the channels in your radio as per the below order.

- For ELRS receivers, set the channels in your radio as per the below order.
For CRSF/ELRS always set ARM switch to CH5/AUX1 on the radio, also set THR to CH6

- Reverse channels on your transmitter if a channel responds the wrong way around. Stick to the right should move the bar to the right. Push stick forward and bar should move to the right.
Receiver Settings

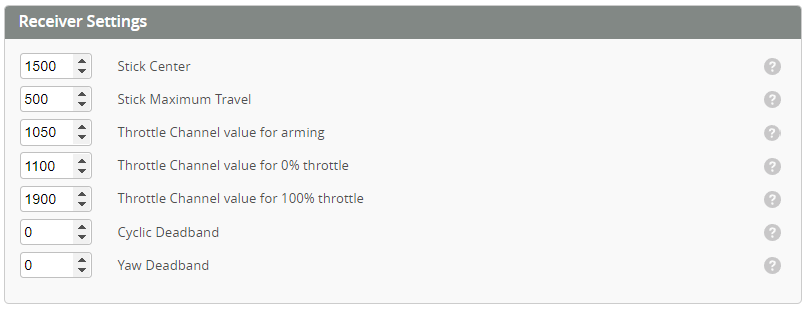
- Stick Center - adjust as required by your radio to achieve 0% when the ROLL, PITCH, YAW sticks are centered.
- Stick Maximum Travel - adjust achieve 100% at the sticks limits.
- Throttle Channel value for arming - channel value under which arming is allowed.Throttle must be below this limit prior to ARM mode being selected.
- Throttle Channel value for 0% throttle - The channel value (in µS) for the channel to be considered 0%.
- Throttle Channel value for 100% throttle - The channel value (in µS) for the channel to be considered 100%.
- Cyclic Deadband and Yaw Deadband - adjust to the smallest possible value that doesn't make your model drift in the Rates Preview window.
Calibrating Stability Mode The stability modes (Angle, Horizon or Rescue) can be calibrated so that the heli doesn't drift much when using such a mode. This can only be done via the accelerometer trims. Do not use trim on your transmitter.
You should end up with something similar to this:

Telemetry Sensors
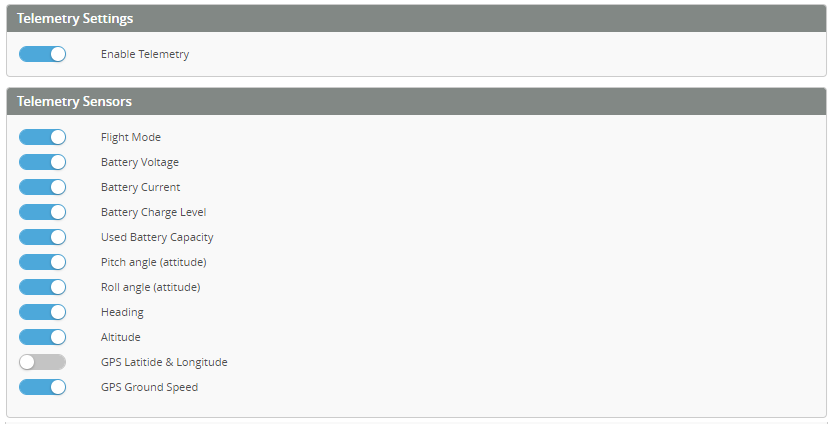
Use the below switch to enable/disable the telemetry stream sent to your radio. Each sensor can then be enabled or disabled individual depending on your requirement.

For ELRS receivers, follow the ELRS Telemetry Reuse WalkTrough for a practical example on ELRS sensors Reuse and Setup.