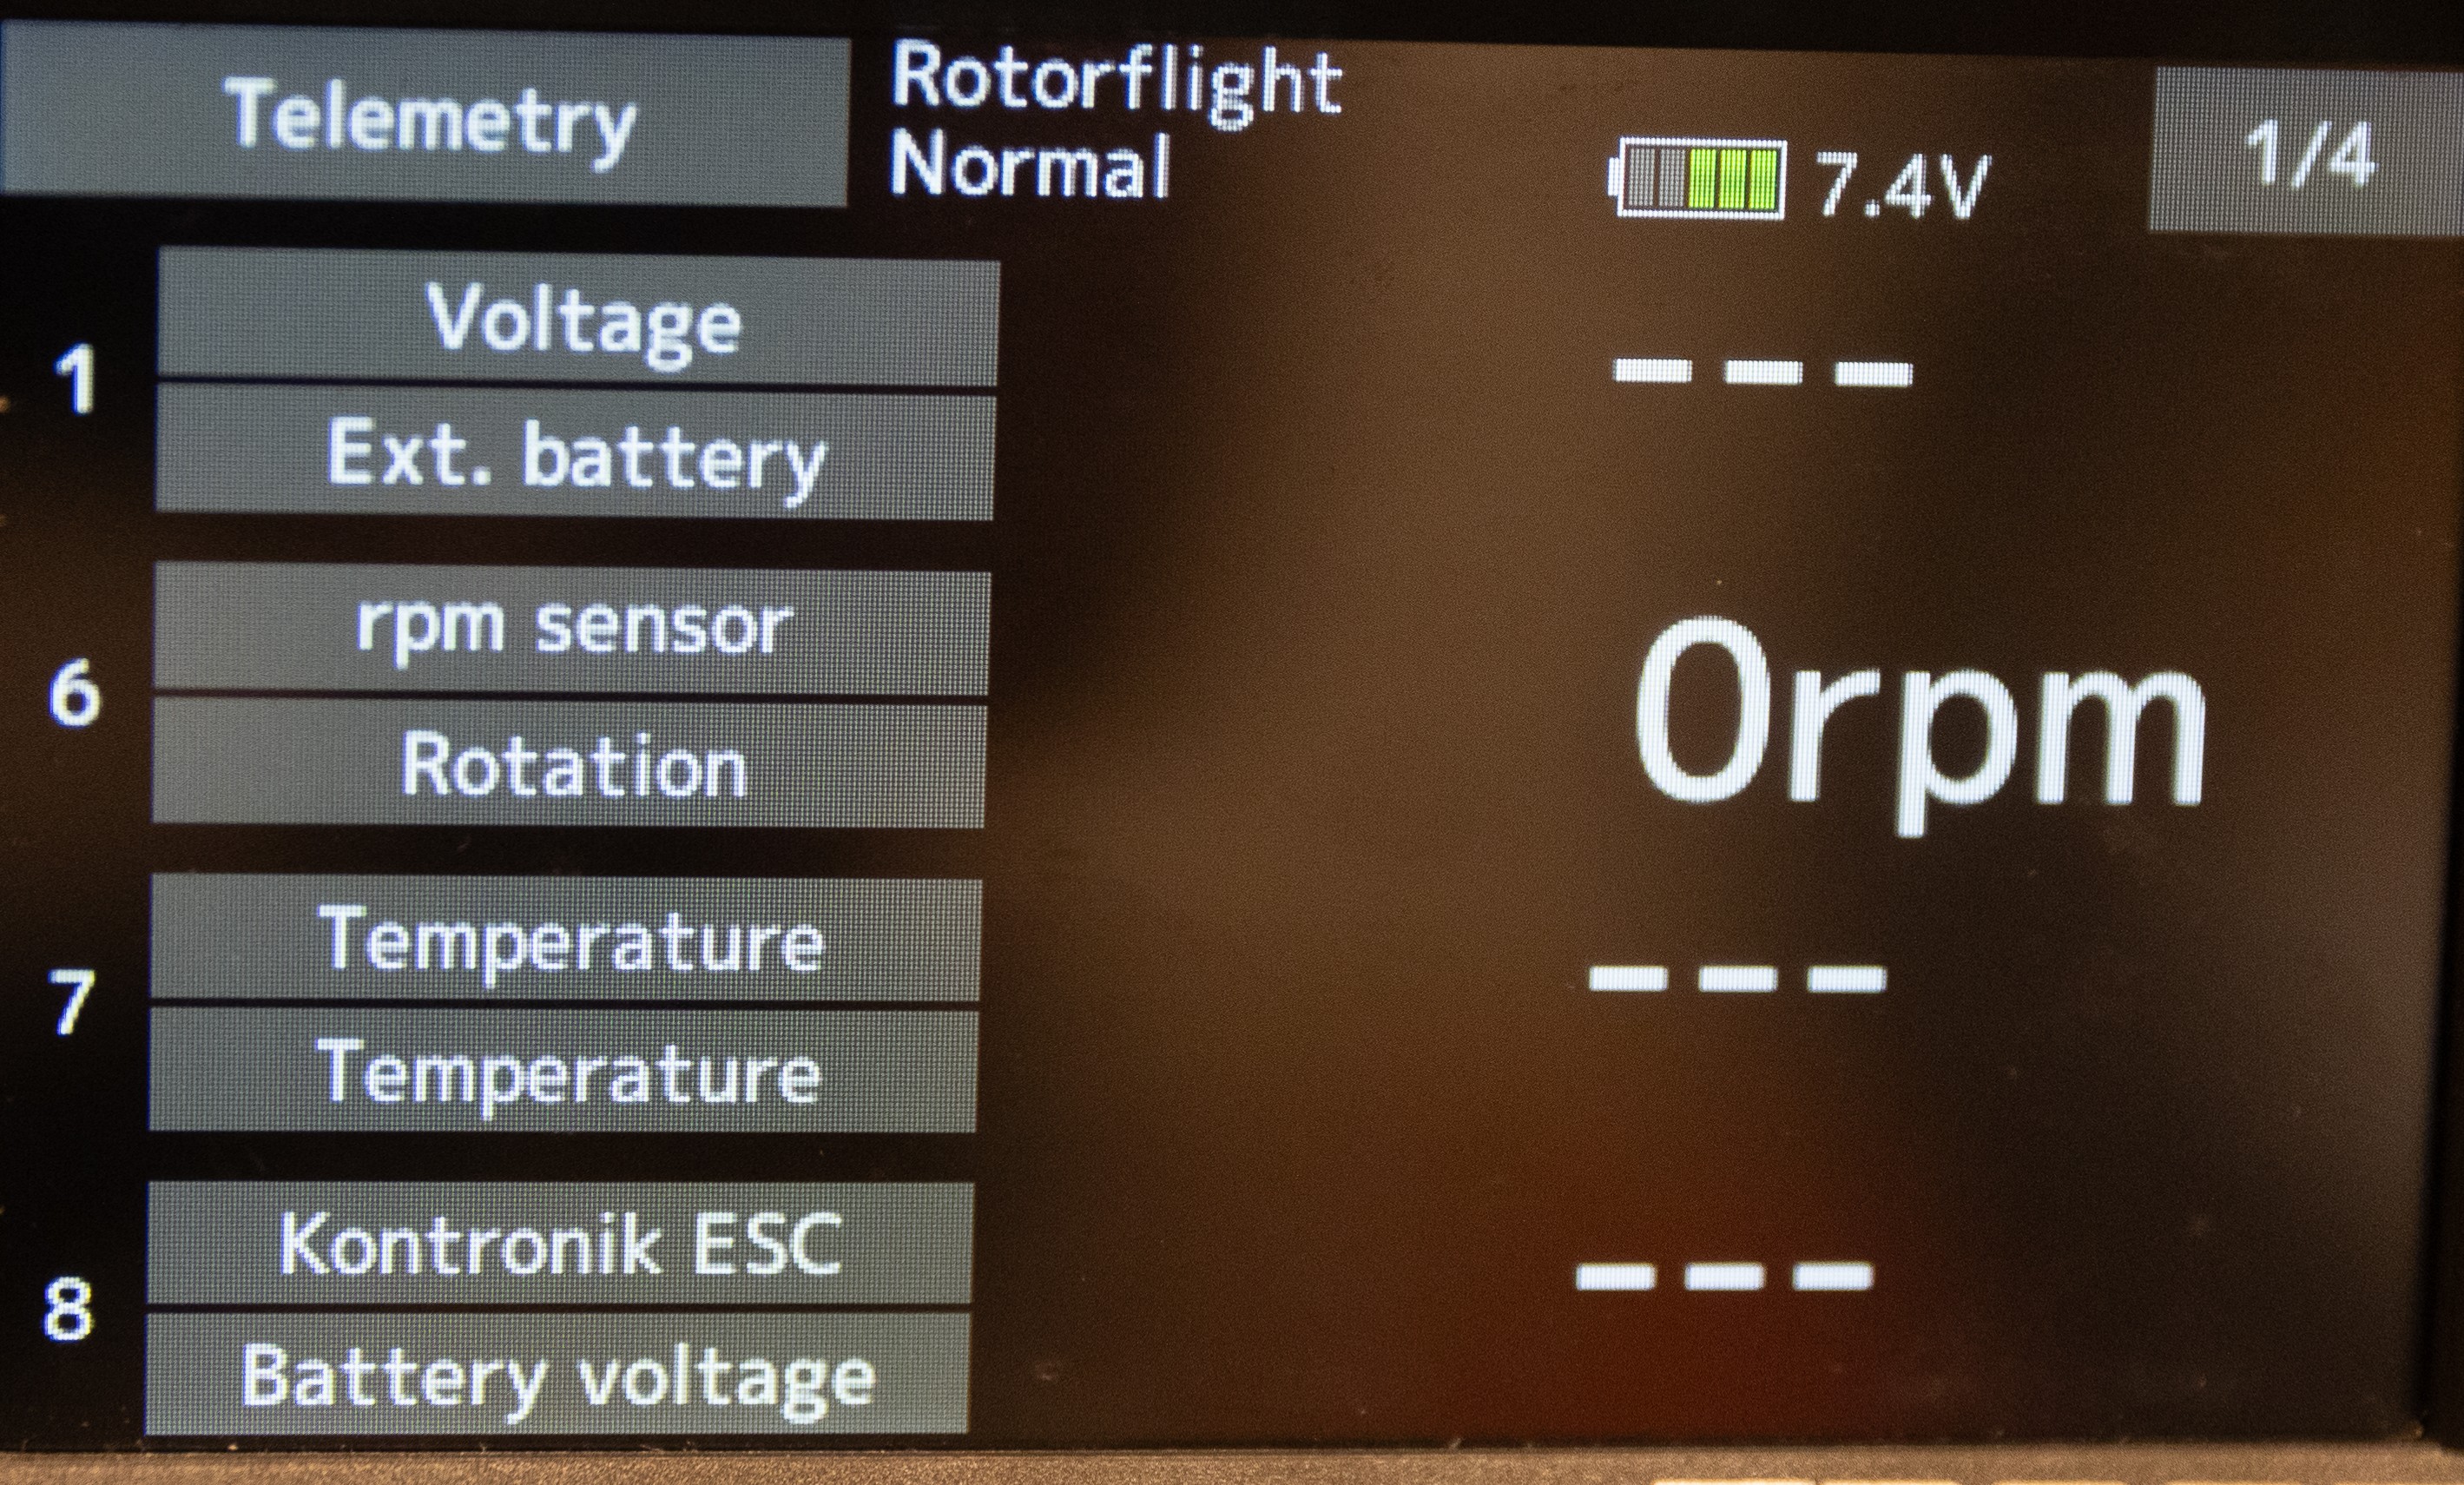
Futaba example
Instructions for Futaba Initial Radio and Configurator Setup, this is a generic setup using Futaba T26SZ transmitter and SBUS2 receiver with a Rotorflight FC. This example shows a Nexus; however, the process is the same for any Rotorflight controller. Please choose the SBUS port related to your FC
Wiring
The simplest is to use a male to male servo lead to connect from the SBUS port on the FBL to the SBUS2 port on your receiver.
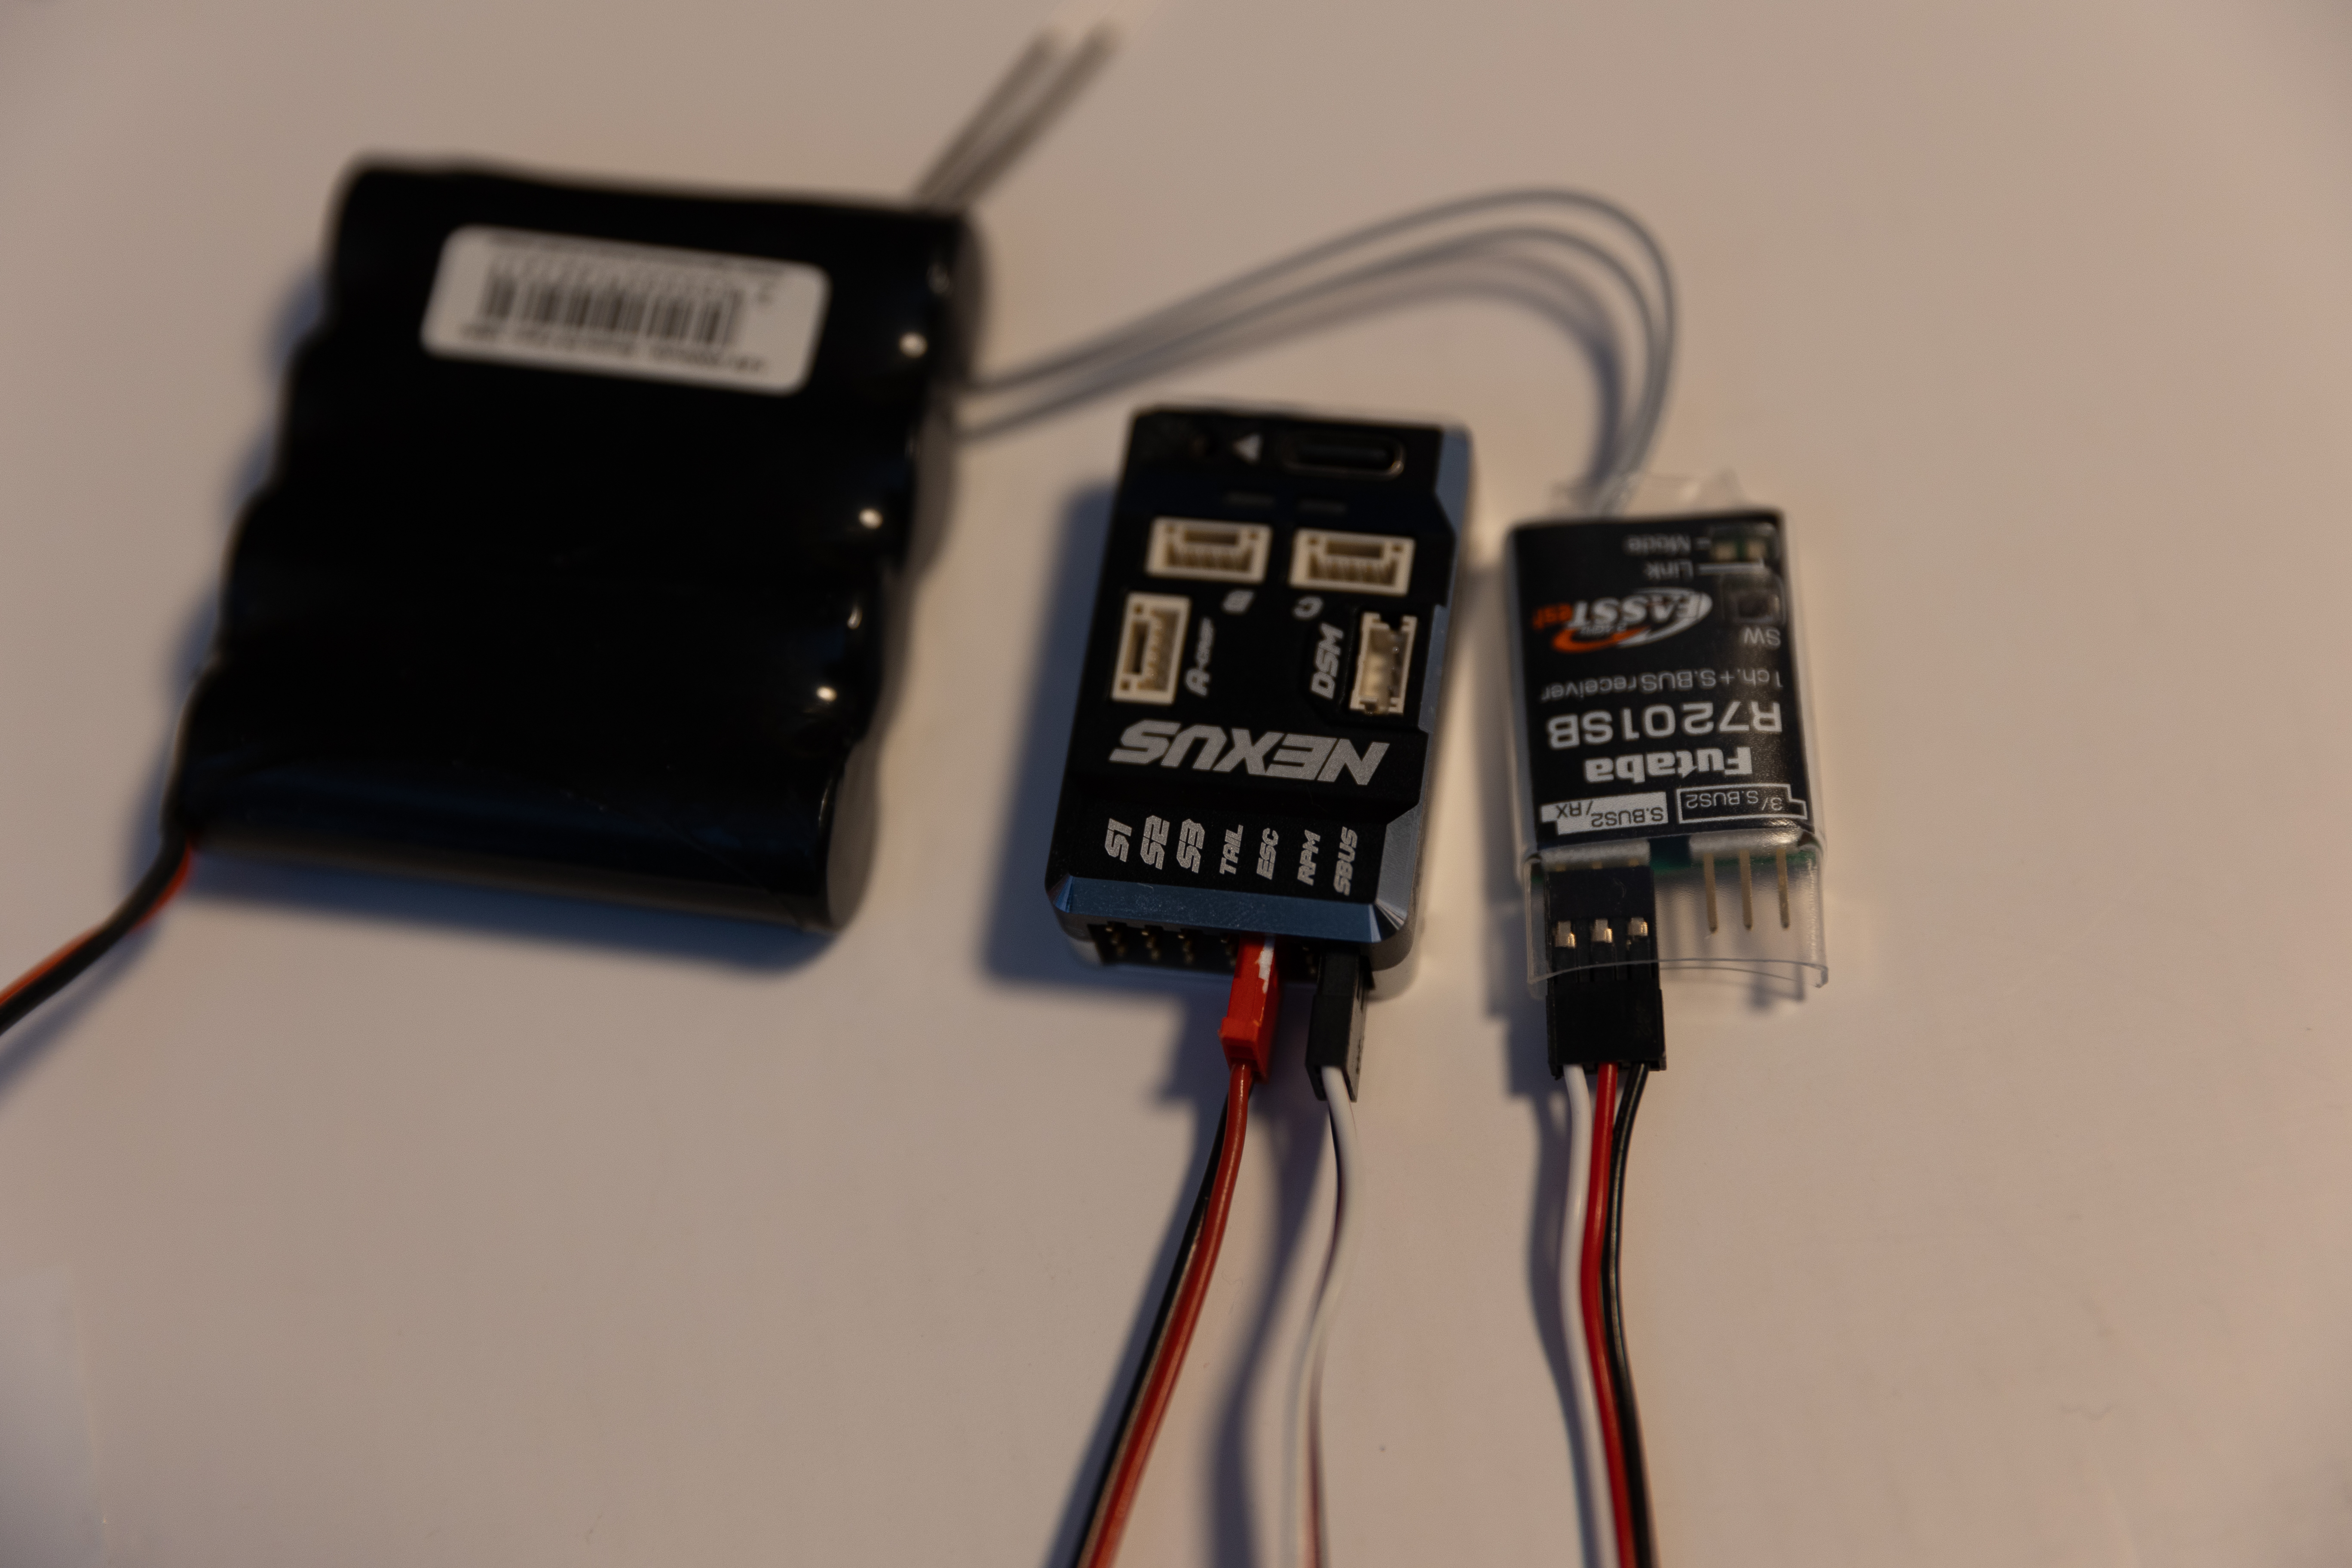
Configure the FC
Next steps are to configure the fbl to receive the SBUS2 signal.
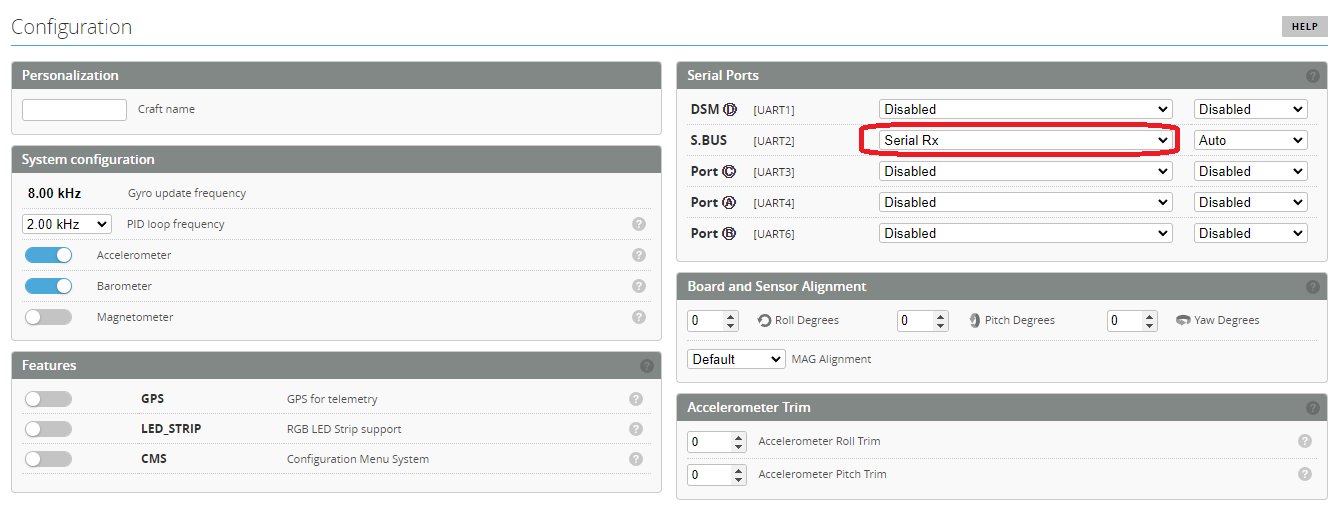
Setup UART ports
Set the SBUS port to be used for serial rx communication
Setup Receiver
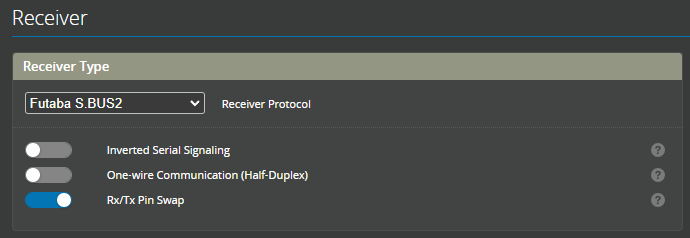
Then visit the receiver page and configure as follows
Setup Radio
On the Linkage Menu -> System Type page, make sure you are using a protocol that supports telemetry, like T-FHSS or FASSTest 18ch and that telemetry is enabled.
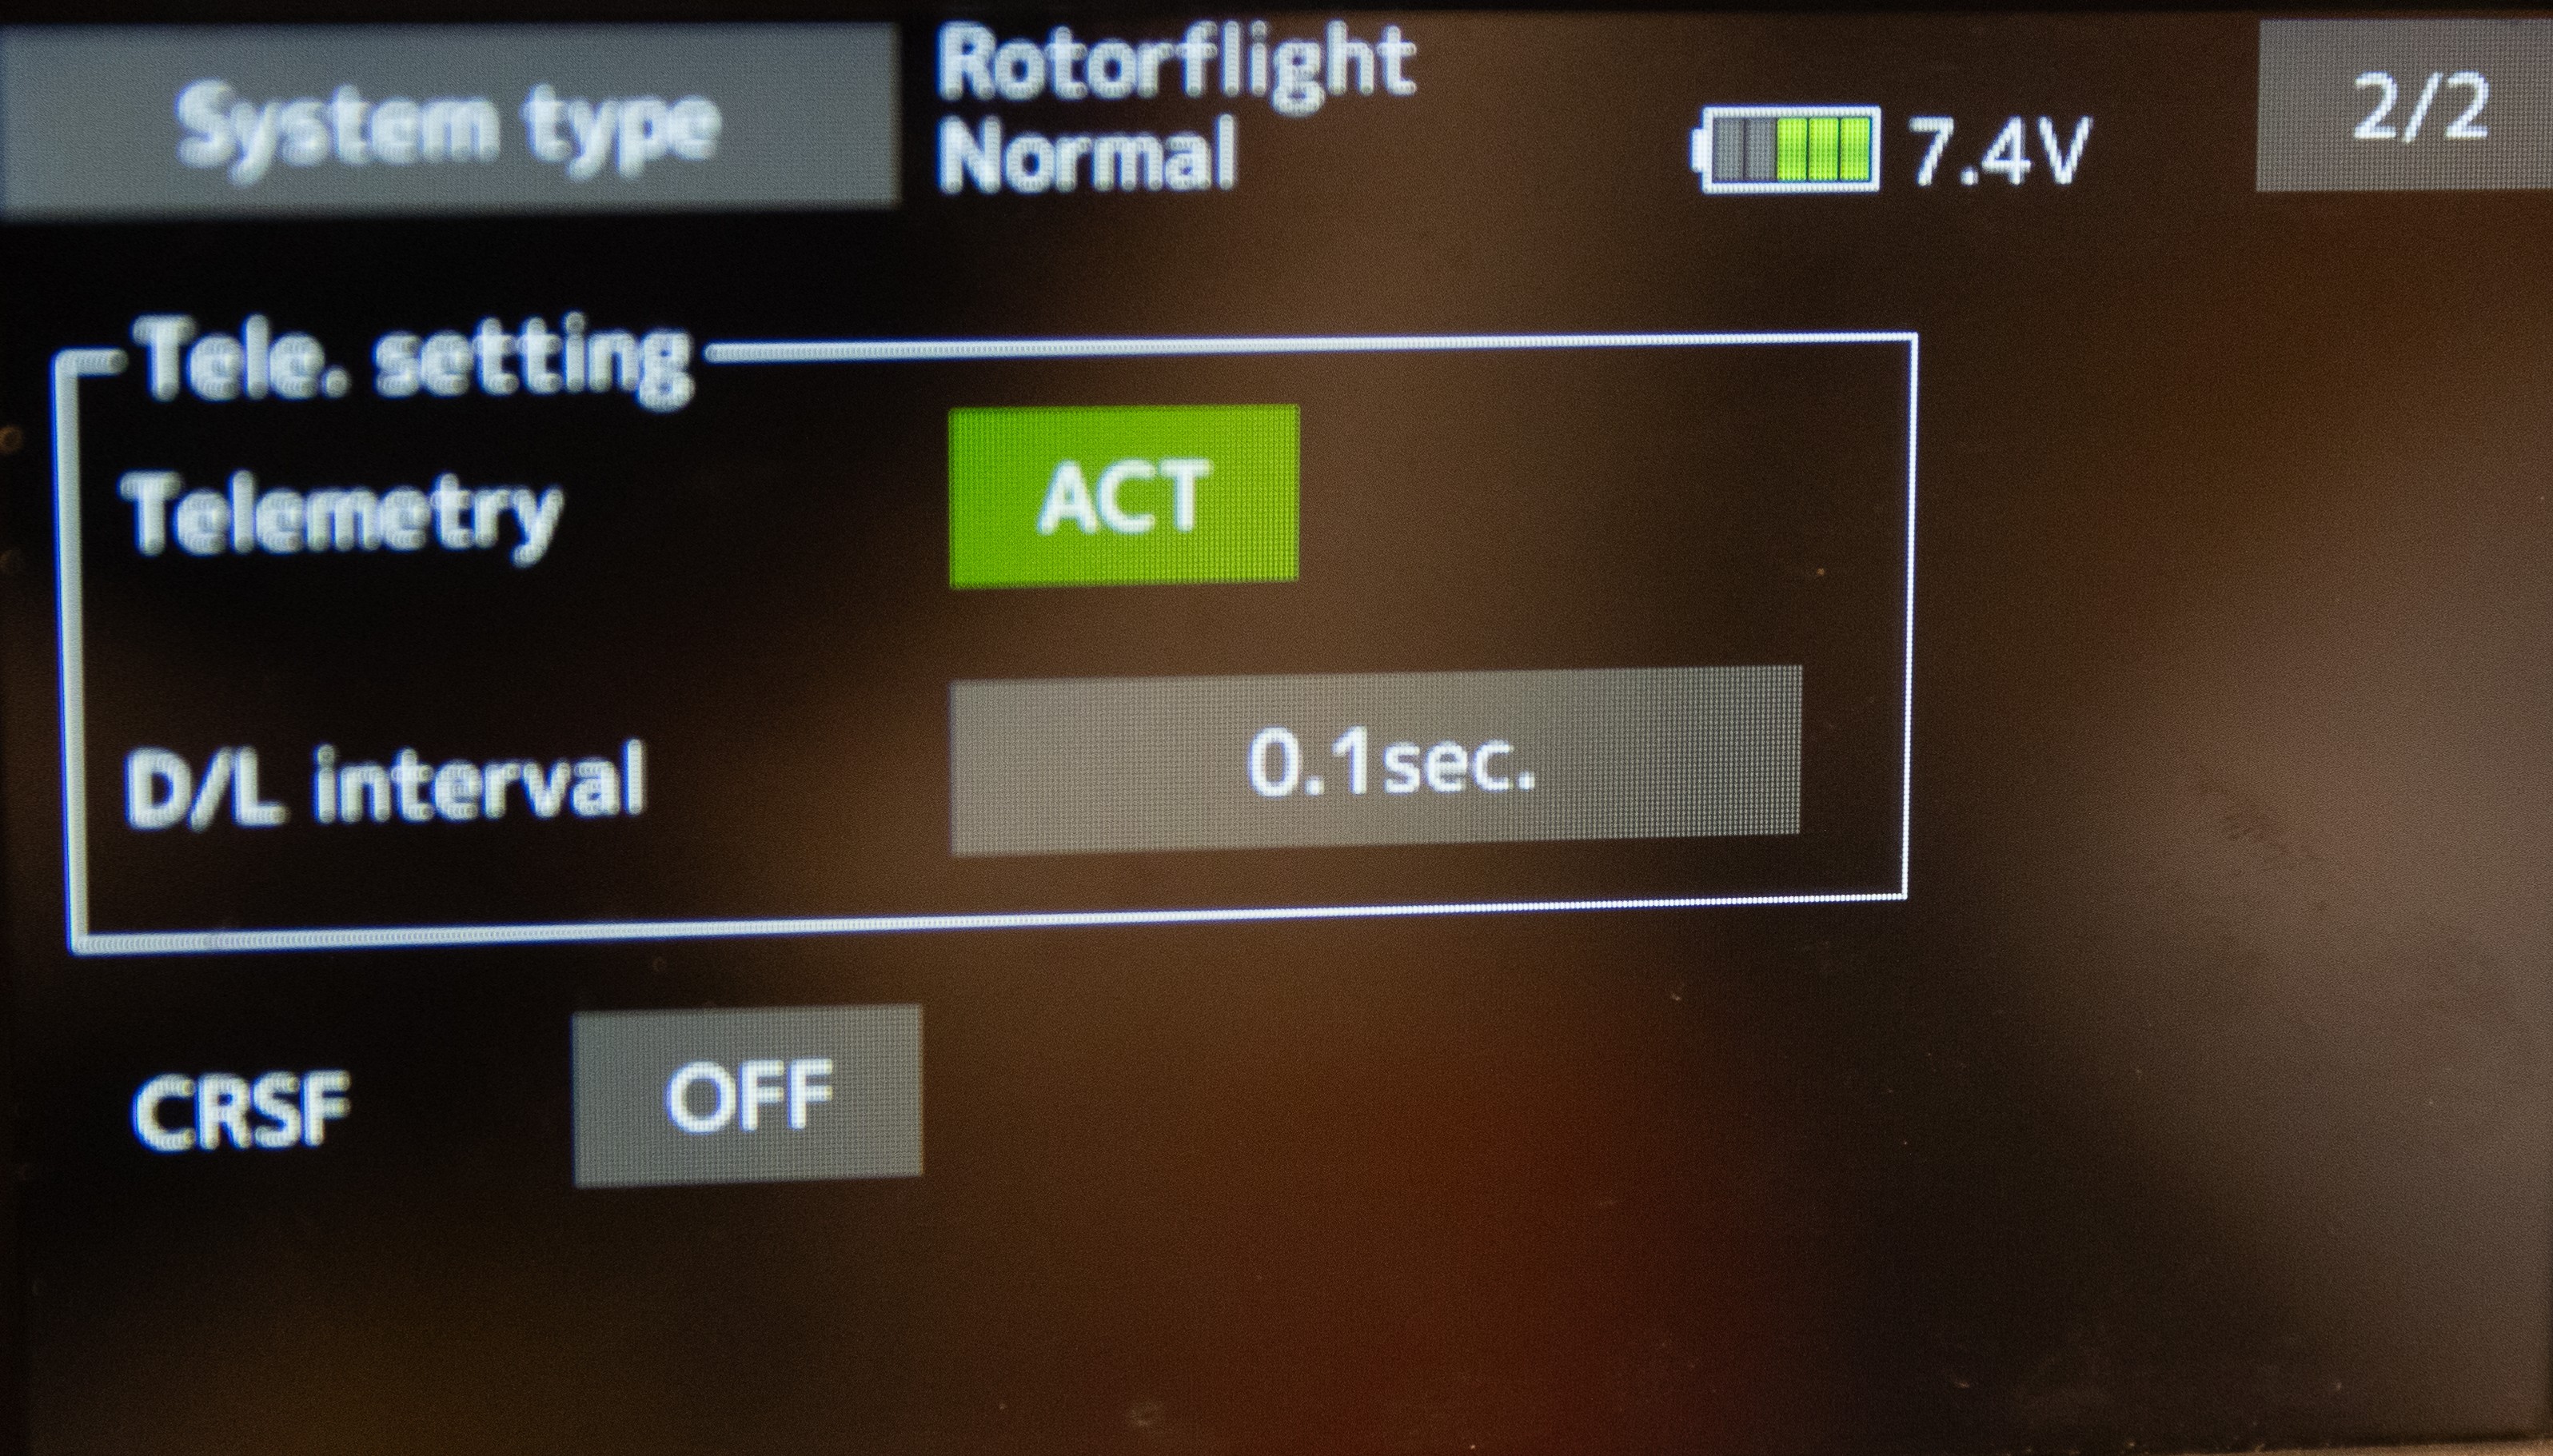
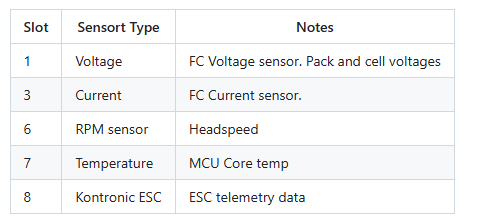
Once you have activated telemetry, you have to configure the list of sensors in the Linkage Menu -> Sensor page. The slot assignment and sensor types are important, otherwise your radio won't display the telemetry information correctly.
Follow the assignment map and example bellow:
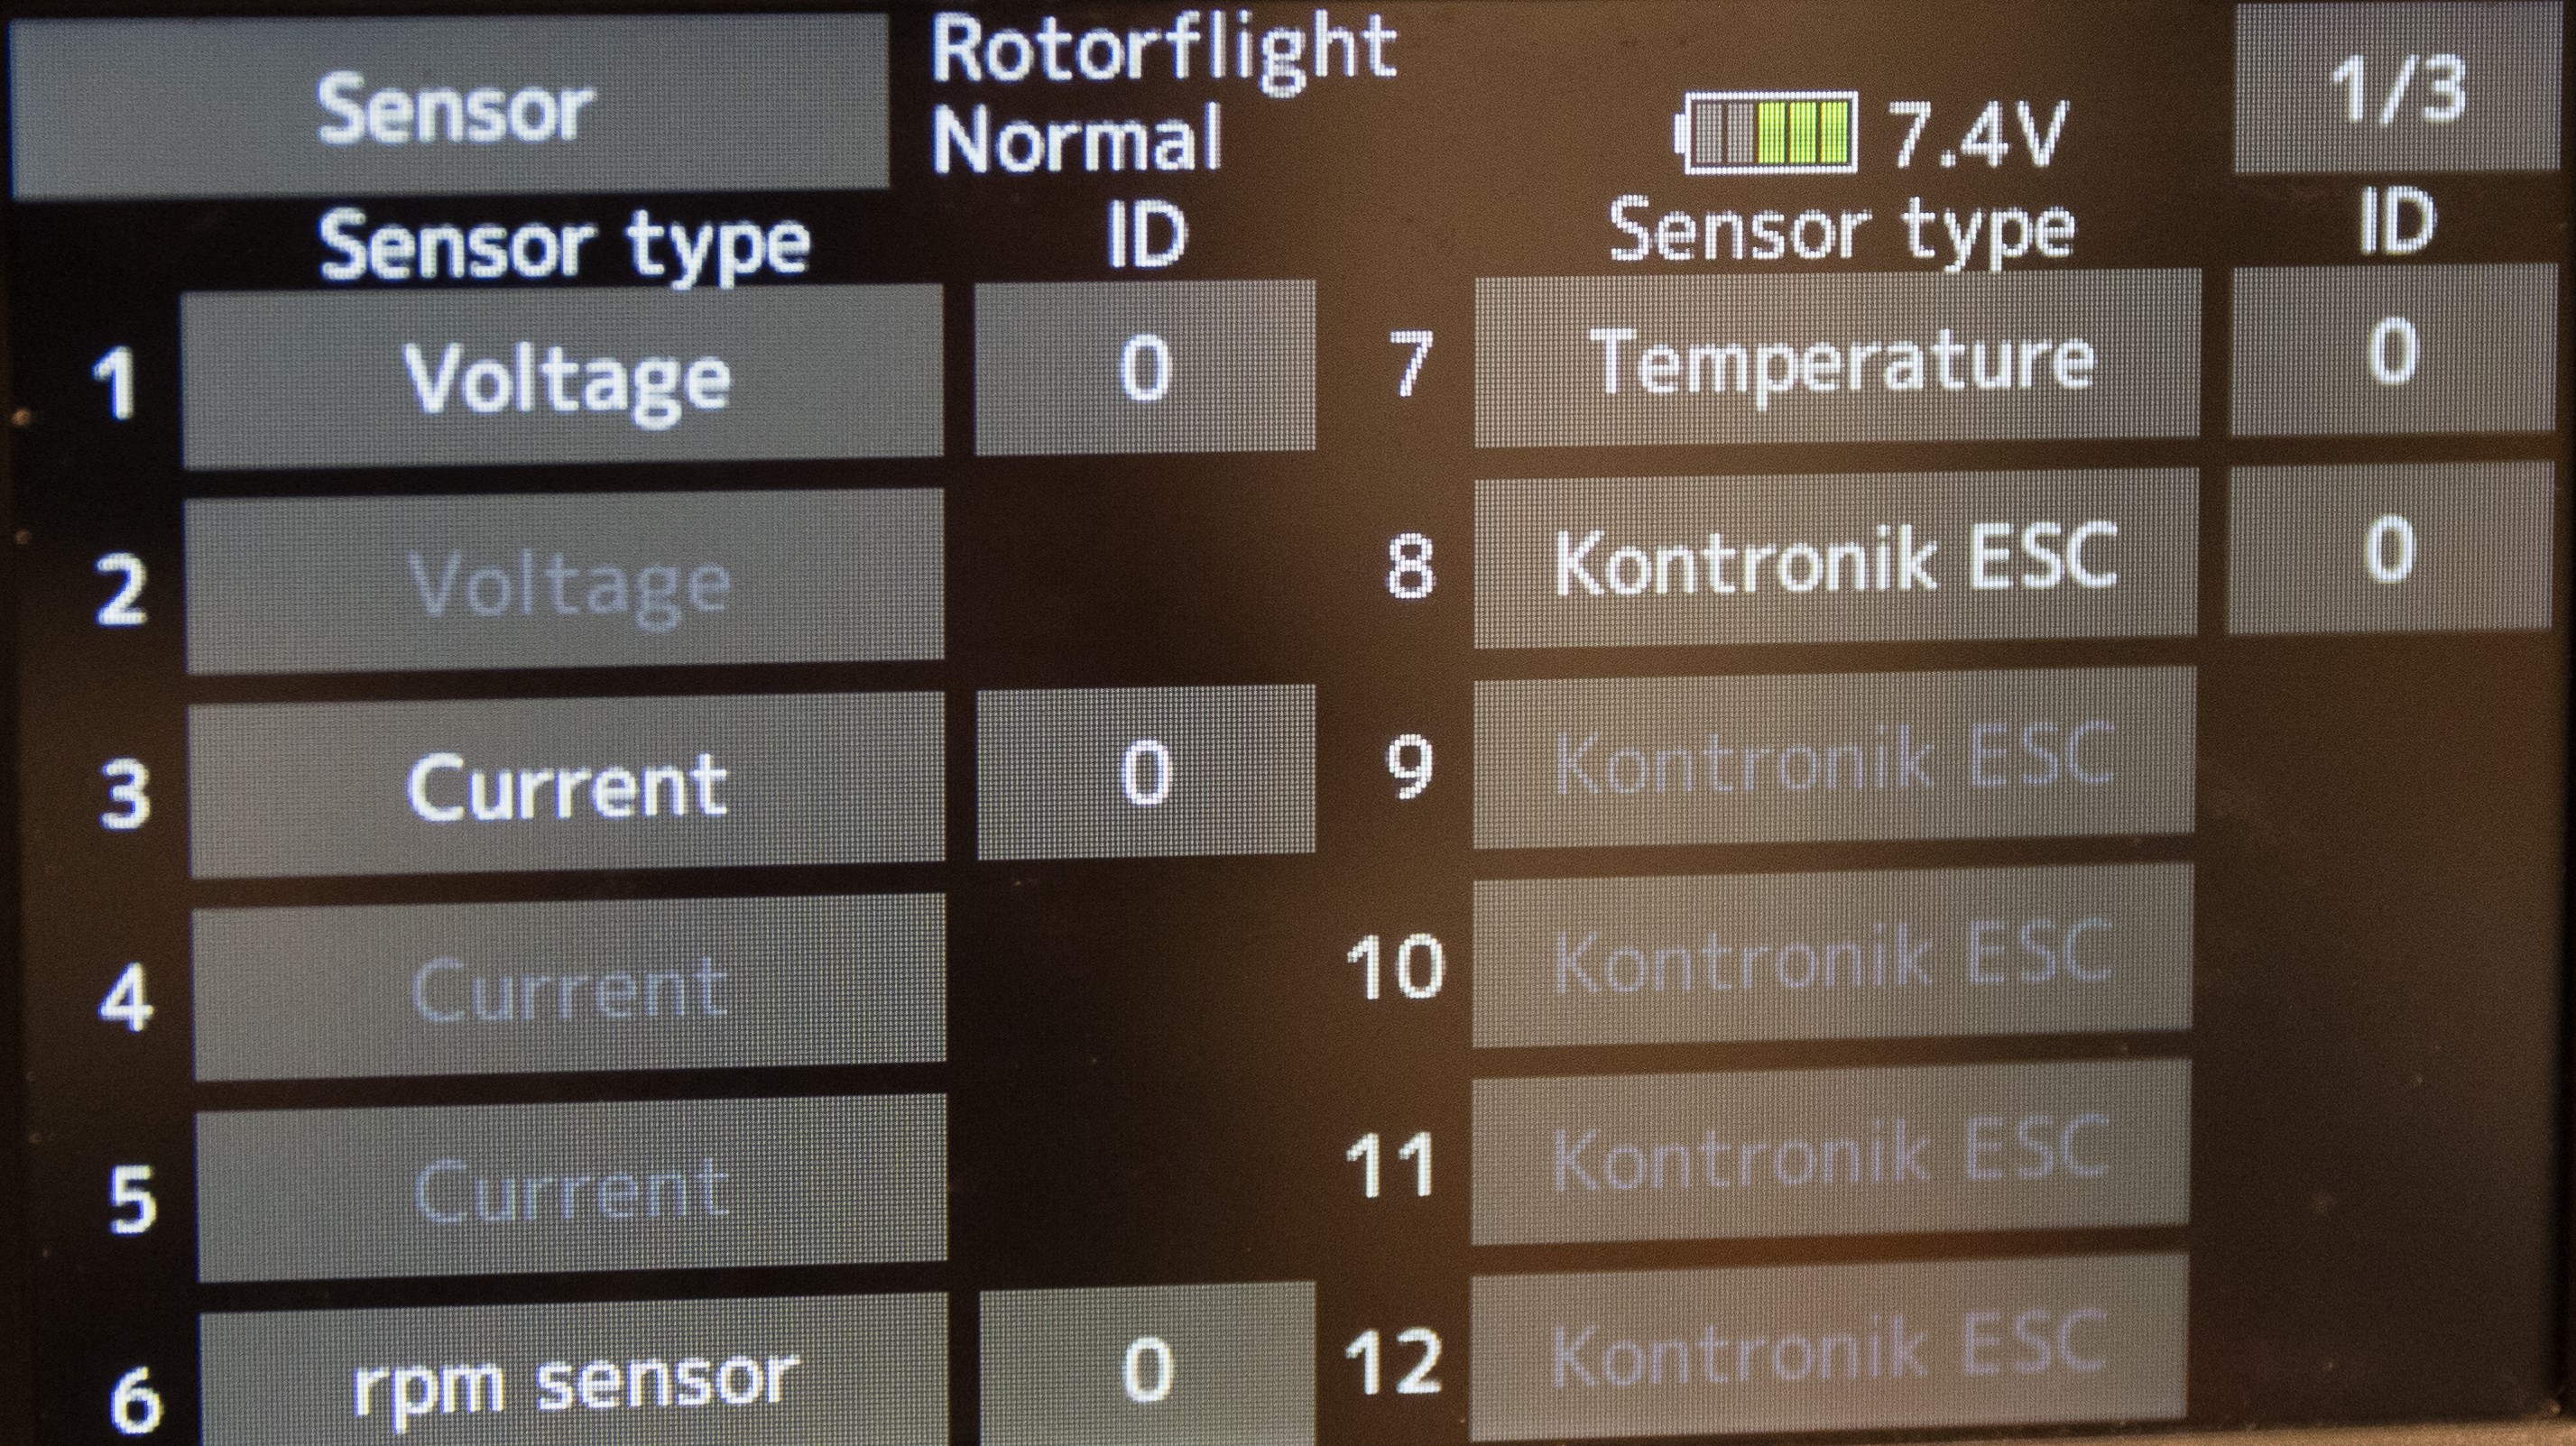
Once your sensors are configured correctly, you should be able to customize your telemetry screen to include the data you want.